3D40/FLX Printer Set-Up
This page walks you through the 5 basic steps to get your Dremel 3D40-FLX setup and ready to print. Watch the video (4min) for an overview.
1. Unboxing and Hardware Walkthrough
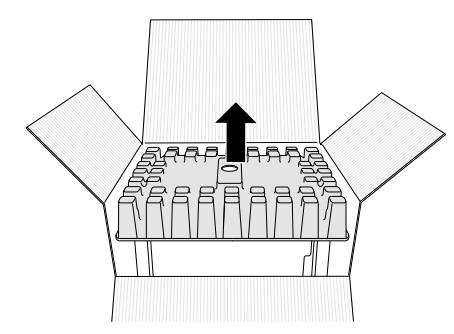
1. Place box on table, cut tape, and open.
2. Remove top insert
3. Remove 3D40-FLX and place on table.
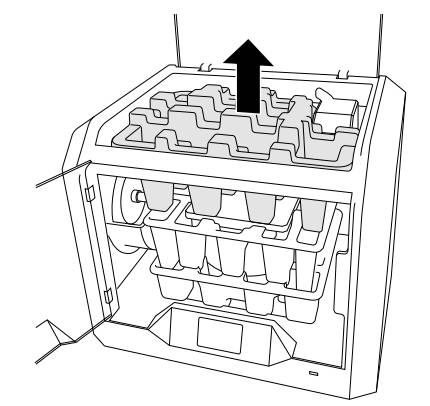
4. Open lid and remove top insert.
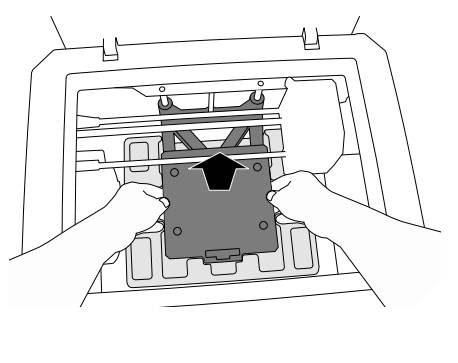
5. Raise build platform by lifting from both sides.

6. Open door and remove middle insert.
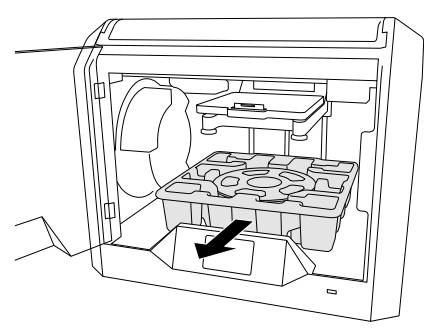
7. Remove bottom insert.
Kit Content
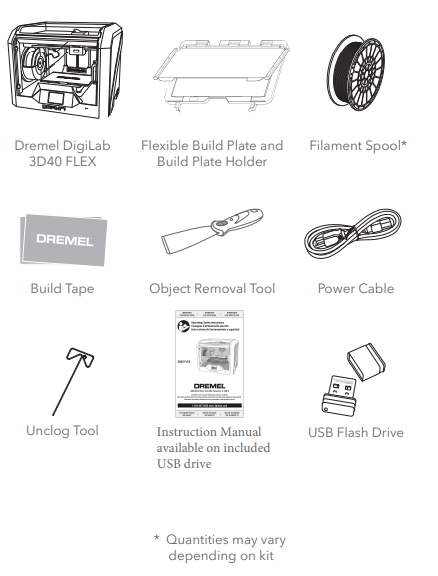
Hardware
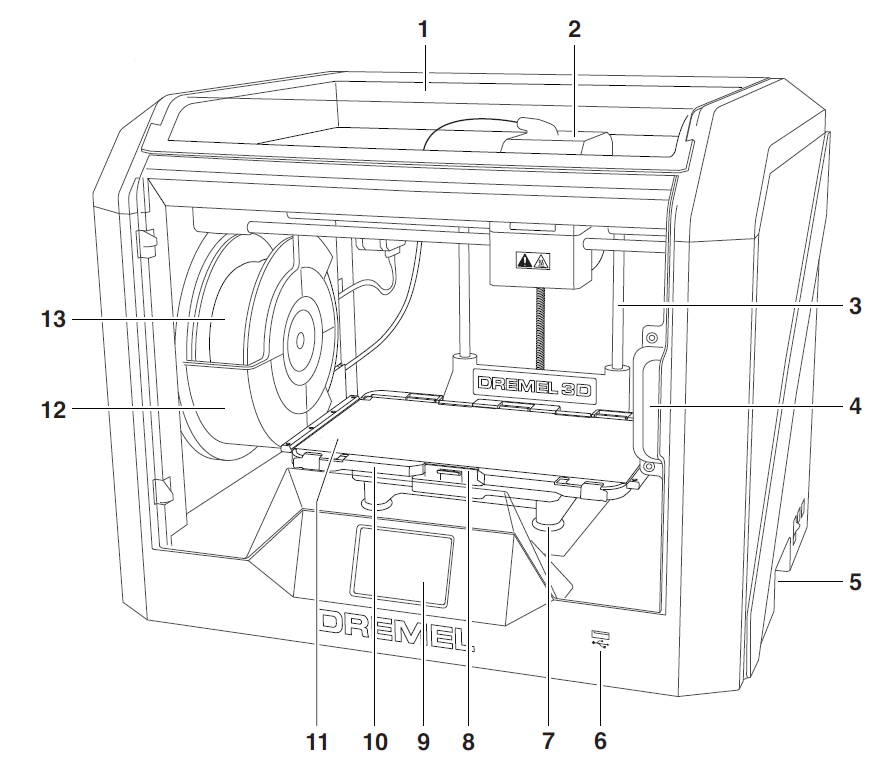
1. Lid
2. Extruder
3. Z-Axis Guide rail
4. Door
5. Gripping Handles
6. USB A Port
7. Leveling Knobs
8. Build Platform Clip
9. Touch Screen
10. Build Plate Holder
11. Flexible Build Plate
12. Filament Spool Holder
13. Filament Spool
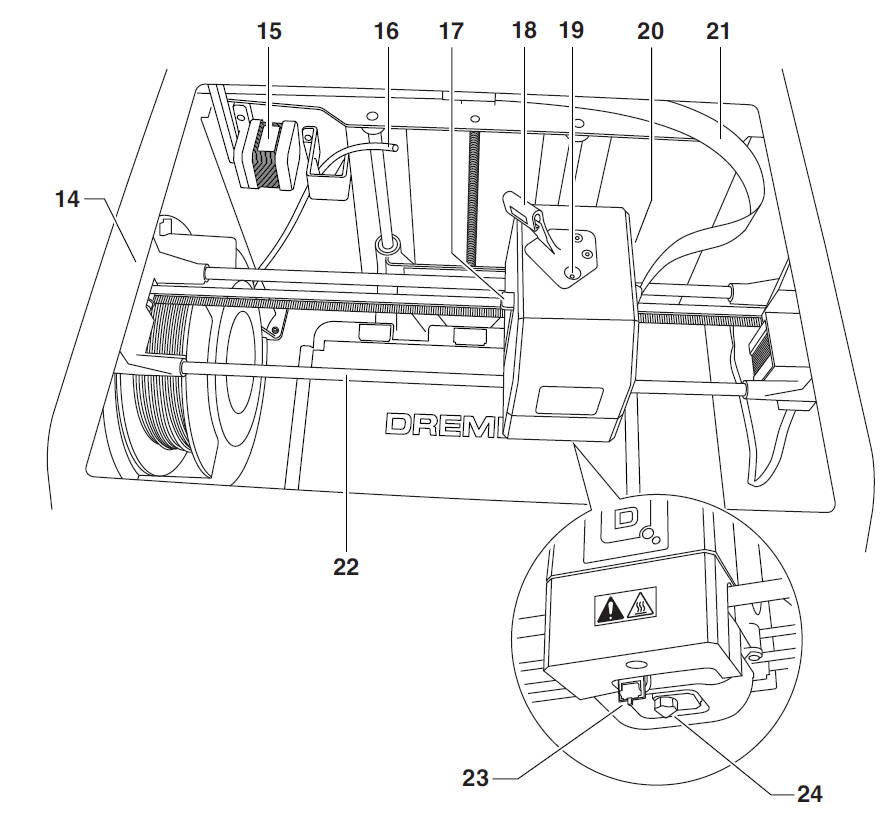
14. Y-Axis Guide Rail
15. Stepper motor
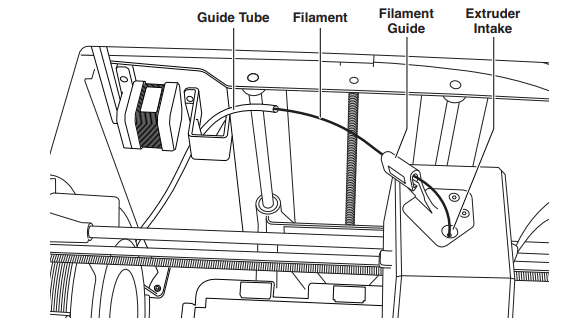
16. Filament Guide Tube
17. Extruder Lever
18. Filament Guide Clip
19. Extruder Intake
20. Extruder Fan
21. Ribbon Cable
22. X-Axis Guide Rail
23. Leveling Sensor
24. Extruder Tip
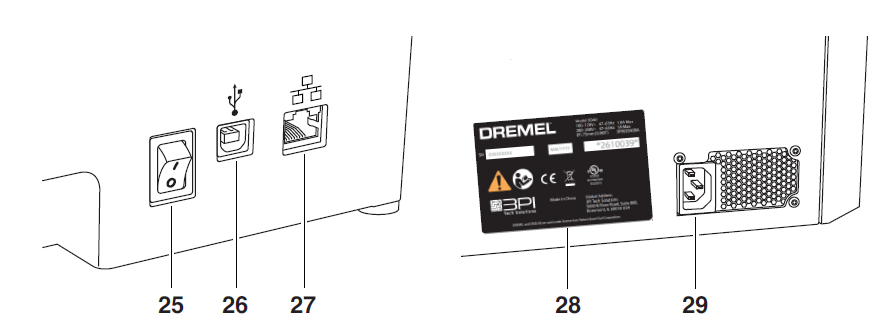
25. Power Switch
26. USB B Port
(Disabled)
27. Ethernet/LAN Port
28. Nameplate
29. Ethernet/LAN Port
30. Nameplate
31. Power Input
2. Preparing Build Plate
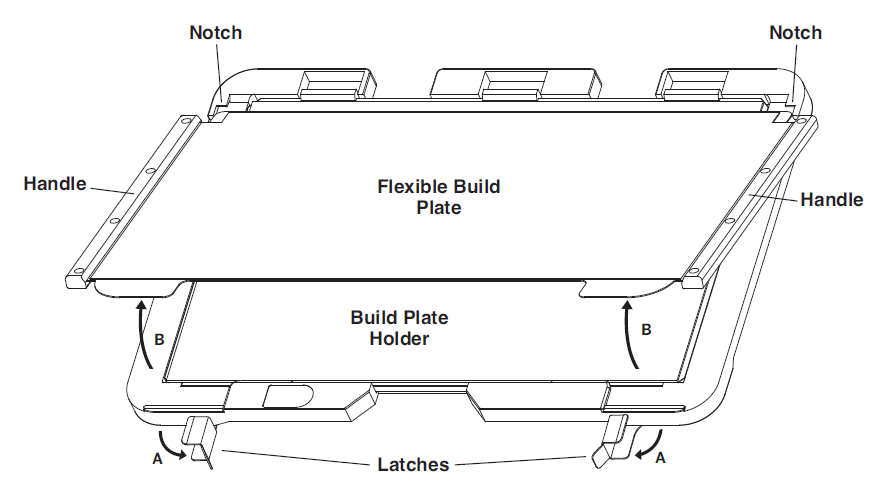
1. Your build plate consists of two parts: the flexible build plate, and the build plate holder. The build plate holder has a magnetic surface to attach the flexible build plate to, and it has two notches in the back and movable latches in the front to hold down the corners of the flexible build plate.
2. The flexible build plate can be removed from the build plate holder by rotating the movable latches towards you (A), lifting the flexible build plate up by the blue handles (B), and pulling it out towards you (C)
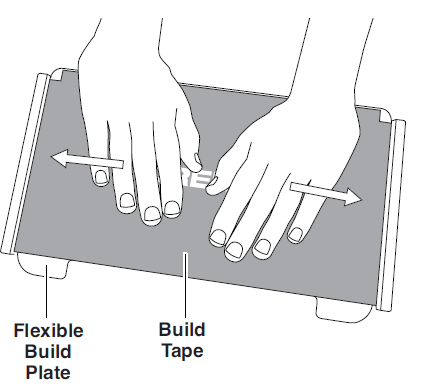
3. The flexible build plate comes with build tape installed. To remove it, lift it up from the tab at the front corner and slowly peel off. To install a new build tape, remove adhesive liner from build tape and place build tape over flexible build plate. For best results, apply build tape at center of flexible build plate and smooth outward to remove any air bubbles
4. The flexible build plate can be installed on top of the build plate holder by sliding it backwards at an angle so that the corners of the flexible build plate slide under the notches at the back of the build plate holder. Release the flexible build plate so it sticks on top of the magnet, and close the latches at the front to hold it in place.
5. The build plate holder can be removed by pinching the clip located at the front of the build platform and lifting the build plate holder off the base
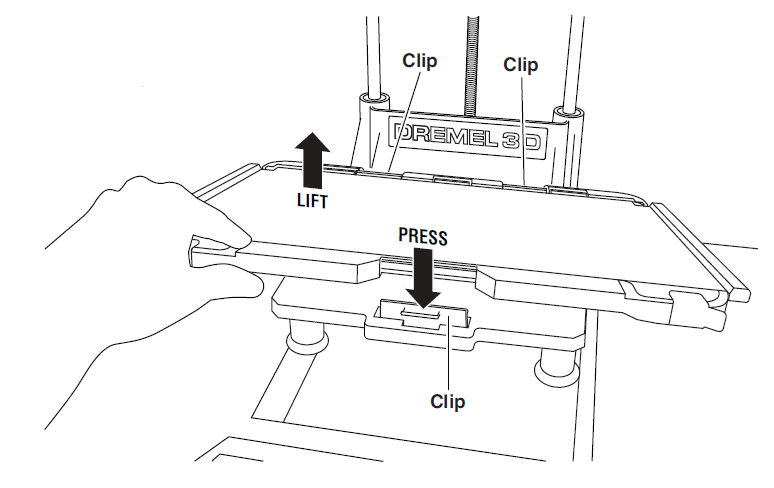
6. Install the build plate holder using the build platform clips.
3. Offline Setup (No internet)
1. Ensure the power switch is in the off position.
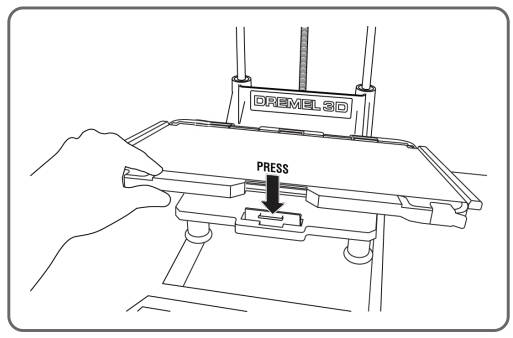
2. Install the buildplate holderusing the buildplatform clips.
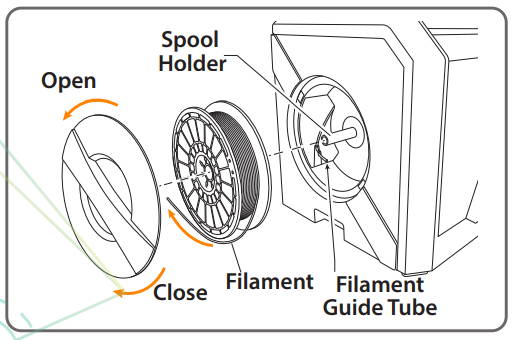
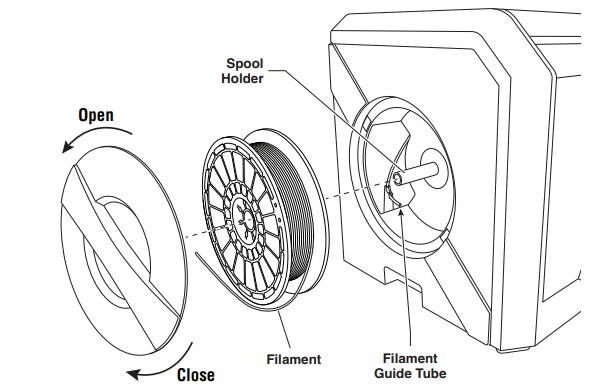
3. Twist spool doorcounter-clockwiseto remove. Placespool onto holderwith filament beingfed from thebottom towardsthe back. Threadfilament throughguide tube.
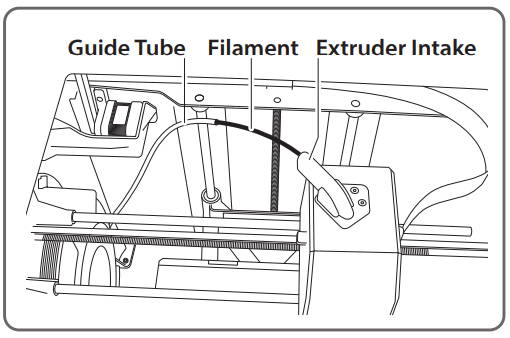
4. Insert filamentfrom the guidetube into theextruder intake.
5. Turn on the power switch and the printer willguide you through the setup process.
Offline Building
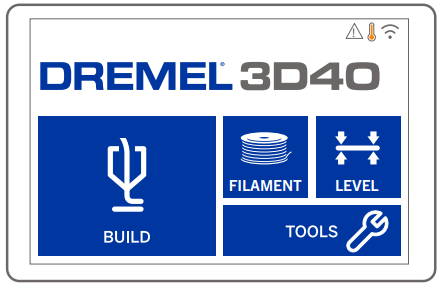
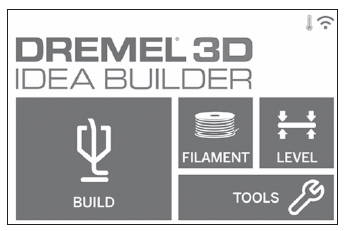
1. On the main screen,tap “Build”. Tap themachine icon to printfrom pre-installedmodels.
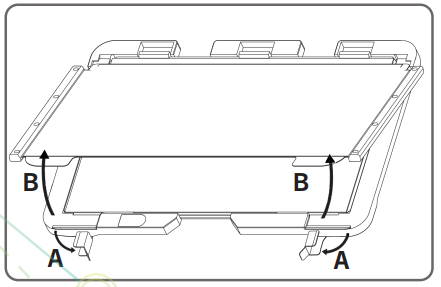
2. Remove the flexiblebuild plate by:
(A) Rotating thelatches
(B) Lifting theflexible buildplate up by theblue handlesand pullingit out
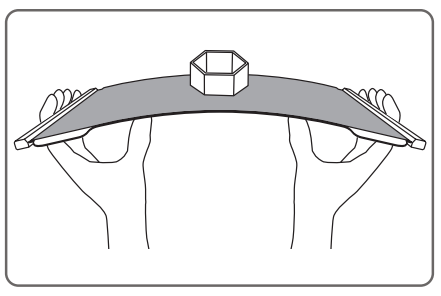
3. Flex the buildplate!Make sure topoint the partaway fromyourself andfrom otherpeople.
4. Initial Setup
The first time you power on your Dremel 3D40-FLX you will be prompted to setup your
printer, connect to a network, update your firmware and create an online account.
Completing this process will give you access to features such as printing wirelessly, printer
sharing amongst your friends and family, notifications of firmware updates, and printer status monitoring. You will then be walked through how to loading your first roll of filament and how to properly level the build plate.
1. Select your country and your language.
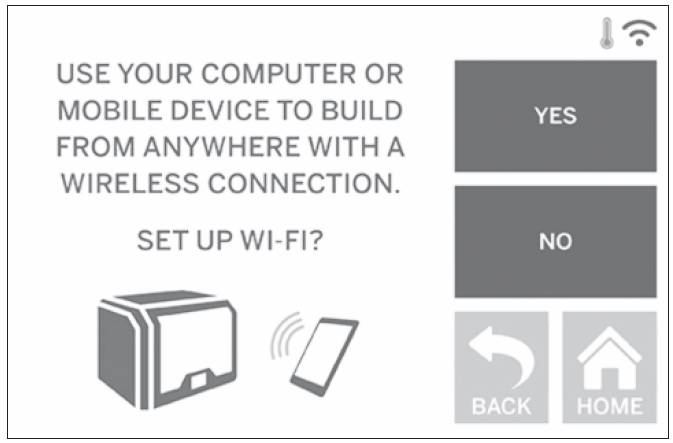
2. To complete initial setup, tap “Yes” when prompted on the initial setup screen. If you decline this setup you can always setup network and register later.
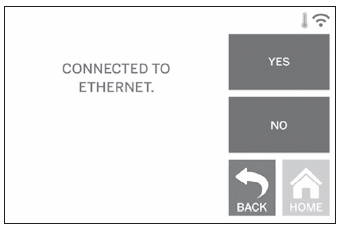
3. If you choose “Yes”, 3D40 will automatically connect to your ethernet (if plugged into router skip to step 5) or search for available wireless networks..
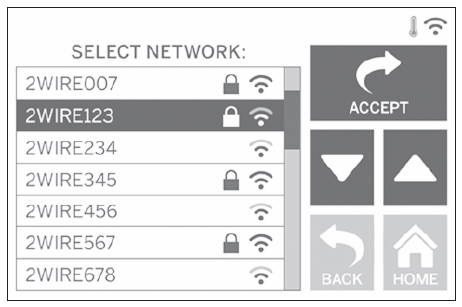
4. Choose your wireless network using the touch screen. Use the arrows to scroll through the list of available wireless networks. When your wireless network name is highlighted, tap “Accept”.
5. Enter your wireless network password and
tap “Accept”.

6. Tap "Yes" to update your firmware (if a firmware update is available) to get the latest features and improvements.
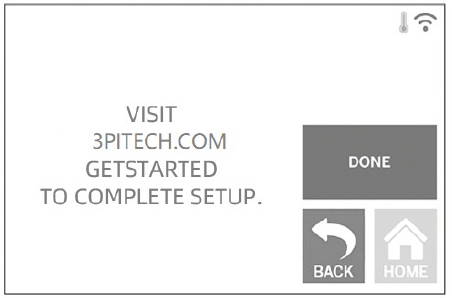
7. Tap “Done” to complete the initial setup
process on your printer.
5. Loading filament
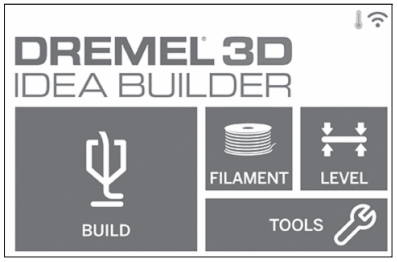
1. Start filament load/change process by tapping “Filament” button on touch screen. Extruder will move to front right corner of print area and extruder tip will begin to heat.
2. After extruder stops moving, open the 3D40 Lid for better access to extruder.
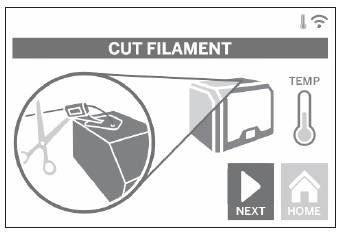
3. If existing filament is loaded, cut existing filament near extruder intake and tap “Next” button on touch screen.
4. Remove Spool door by rotating it counter clockwise and remove existing spool if
one is present.
5. Thread tip of new filament through guide tube, place spool on spool holder, replace spool door by aligning locking tabs and rotating clockwise. Tap “Next” on touch screen.
6. If changing existing filament, 3D40 will automatically purge existing filament.
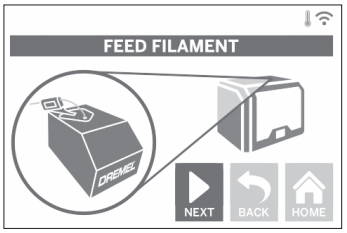
7. When Feed Filament screen appears, tap “Next” on touch screen and thread filament coming from guide tube into extruder intake until extruder feeds through on its own.
8. Filament will be drawn into the extruder and begin to exit from the hot extruder tip.
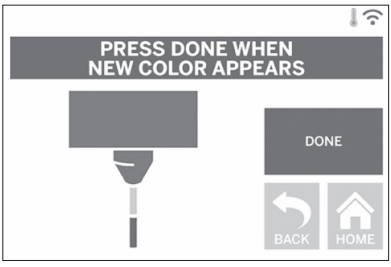
9. When new filament appears from extruder
tip, tap “done” on touch screen to complete filament load process, return to main menu, and calibrate extruder. Carefully remove excess filament without touching hot extruder tip. If necessary, carefully remove debris from extruder tip with needle nose pliers.
10. Close 3D40 lid and door.
6. Leveling Build Plate
It is important you level the build plate every time you replace the build tape or reinstall the build plate to ensure that the build plate is evenly spaced from the extruder head. Make sure to remove any air bubbles from between the build plate and the build tape. Not leveling the build plate or eliminating air bubbles may cause objects to not build properly.
1. Make sure you have placed build tape on build plate and no objects are present. Applying build tape after leveling may effect the consistency of your object.
2. Tap “Level” on 3D40’s touch screen.
3. The extruder and build platform will move into position to level the build plate. 3D40 will first check level at the back center of the build plate. The two knobs under the build platform are used to raise and lower the build platform on the left and right. The extruder contains a sensor that detects if the bed is level, no additional tools are necessary.
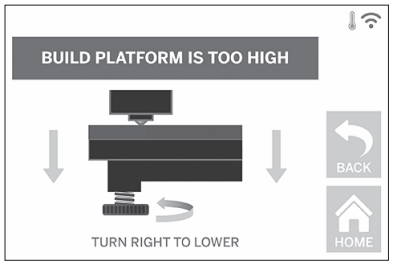
4. The touch screen will indicate if your build plate is too high or too low. If the build plate is too high, adjust the appropriate knob by rotating right until you hear a “beep” and the touch screen indicates that it is ready to verify that the bed is level. If the build plate is too low, adjust the knob by rotating left.
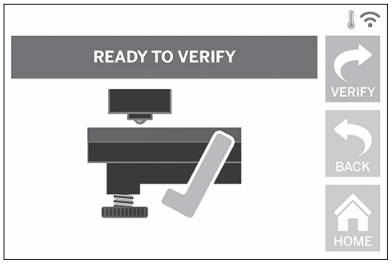
5. Tap “Verify” to check the platform level. Iffurther adjustment is needed the touchscreen will indicate the direction, if thelevel is correct, the extruder will move tothe next point and the level process canbe repeated.
6. Repeat steps 4-6 for the second position, when platform is fully level the extruder will automatically move to the calibration position and complete the leveling process.
7. Building
1. On the main menu tap “Build”.
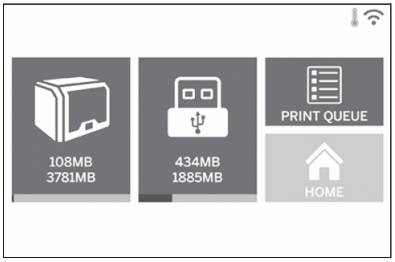
2. On the build menu tap the printer icon if you want to print from on-printer storage.
If you want to print from USB Flash Drive, tap USB icon.
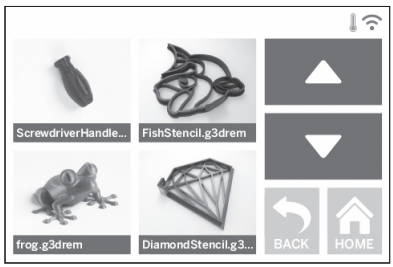
3. Tap the model file you would like to build.(Use arrows to scroll through pages)
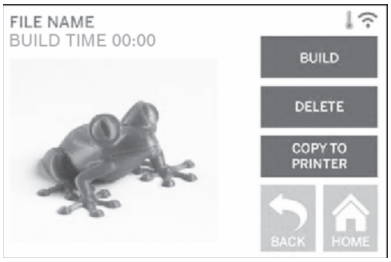
4. In the model detail page tap “Build” tobegin building process.
5. Your extrudertip will begin to heat which may take a fewminutes. Once the proper temperature isreached your model will begin to build.
6. Once your object it's finished, wait until the touch screen indicates thatthe extruder is “cool” to remove yourobject.
BUILDING FROM PRINT QUEUE
If your 3D40 is registered and added to your Dremel3D profile, you can send Builds from your web browser at www.3pitech.com.
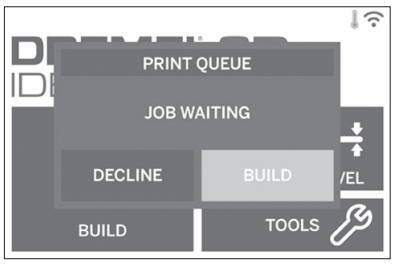
1. If your 3D40 is displaying the Print Queue notification tap “Build” in the notification window to access the Print Queue. If you choose “Decline” you can later access your Print Queue by tapping “Build” then “Print Queue”.
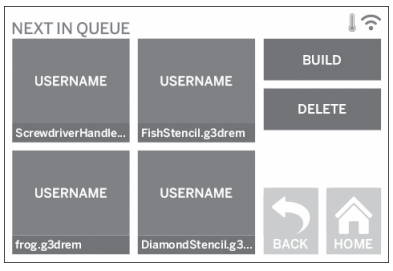
2. In the Print Queue menu you can choose to “Build” the next model in the queue or “Delete” it and advance to the next model.
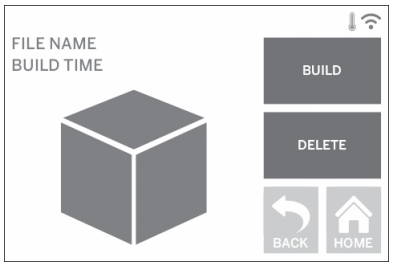
3. In Model Details tap “Build” to begin building process or “Delete” to remove the file.