3D40/FLX 3D Printing Basics
- Build Tape Application
- Print Removal
- Leveling Build Platform
- Loading Filament
Build Tape Application
This page walks you through how to properly apply the Build Tape. To buy Dremel Build Tape click here
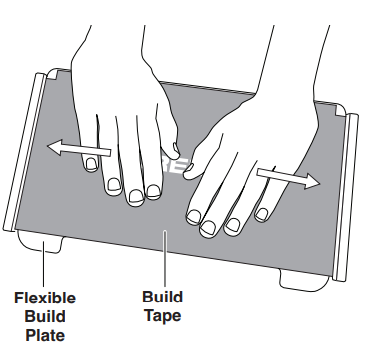
The flexible build plate comes with build tape installed. To remove it, lift it up from the tab at the front corner and slowly peel off.
To install a new build tape, remove adhesive liner from build tape and place build tape over flexible build plate. For best results, apply build tape at center of flexible build plate and smooth outward to remove any air bubbles.
Print Removal
Be aware of your body position when using hand tools to remove objects from the build platform. Sudden tool slip and improper body position during object removal from the build platform may result in personal injury.
To buy the scraper click here
1. Wait for the extruder to cool before removing your object.
2. With the object still attached, remove build platform from the build area.
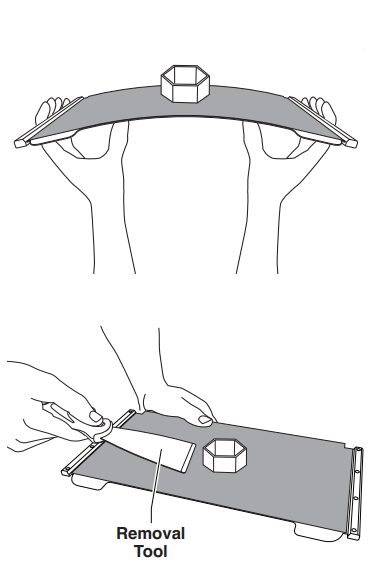
3. Flex the build plate with the object pointed away from yourself and others. Push on the back of it with your thumbs using your other fingers to hold onto the handles. The part will release and will either fall off or be easy to pull off with your hand.
4. For thin or small parts, flexing the build plate may not be enough to release the part. In these cases, gently use the object removal tool to remove the object from the build plate.
Leveling Build Platform
This page you will find the steps to level your build platform. Watch the video for an overview or follow the step by step.
It is important you level the build plate every time you replace the build tape or reinstall the build plate to ensure that the build plate is evenly spaced from the extruder head. Make sure to remove any air bubbles from between the build plate and the build tape. Not leveling the build plate or eliminating air bubbles may cause objects to not build properly.
1. Make sure you have placed build tape on build plate and no objects are present. Applying build tape after leveling may effect the consistency of your object.
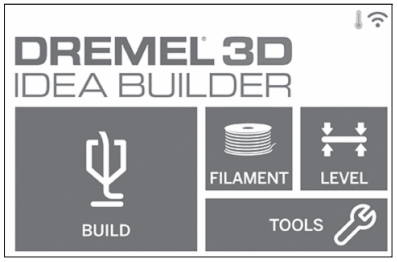
2. Tap “Level” on 3D40’s touch screen.
3. The extruder and build platform will move into position to level the build plate. 3D40 will first check level at the back center of the build plate. The two knobs under the build platform are used to raise and lower the build platform on the left and right. The extruder contains a sensor that detects if the bed is level, no additional tools are necessary.
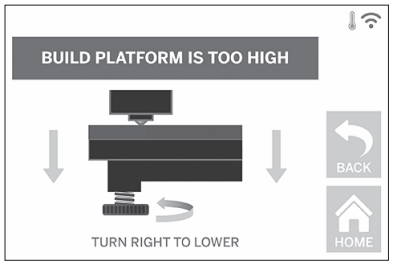
4. The touch screen will indicate if your build plate is too high or too low. If the build plate is too high, adjust the appropriate knob by rotating right until you hear a “beep” and the touch screen indicates that it is ready to verify that the bed is level. If the build plate is too low, adjust the knob by rotating left.
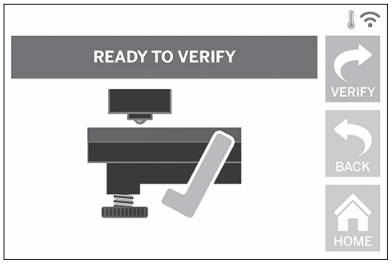
5. Tap “Verify” to check the platform level. Iffurther adjustment is needed the touchscreen will indicate the direction, if thelevel is correct, the extruder will move tothe next point and the level process canbe repeated.
6. Repeat steps 4-6 for the second position, when platform is fully level the extruder will automatically move to the calibration position and complete the leveling process.
Loading Filament
Watch the video or steps below to change or install a new filament spool in your 3D40-FLX printer.
To purchase filaments for your printer click here
For more information about filament Properties and Settings click here
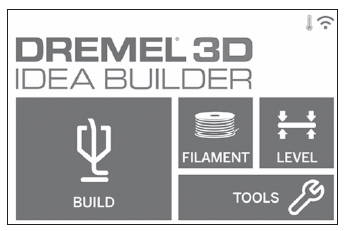
1. Start filament load/change process by tapping “Filament” button on touch screen. Extruder will move to front right corner of print area and extruder tip will begin to heat.
2. After extruder stops moving, open the 3D40 Lid for better access to extruder.
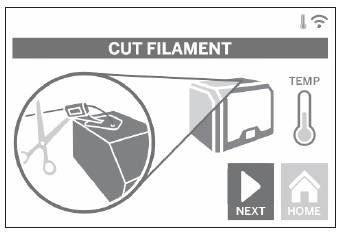
3. If existing filament is loaded, cut existing filament near extruder intake and tap “Next” button on touch screen.
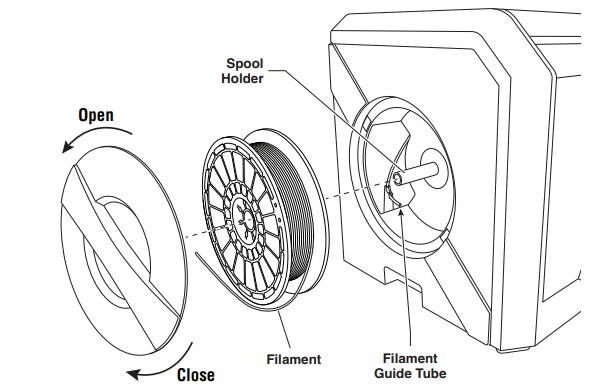
4. Remove Spool door by rotating it counter clockwise and remove existing spool if
one is present.
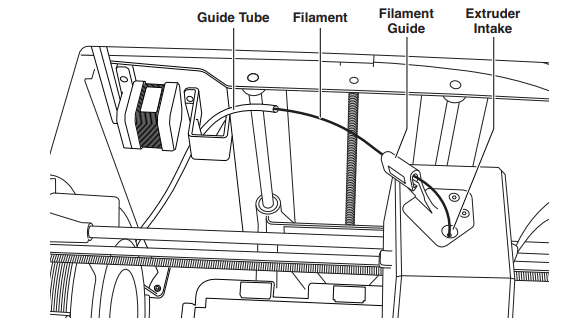
5. Thread tip of new filament through guide tube, place spool on spool holder, replace spool door by aligning locking tabs and rotating clockwise. Tap “Next” on touch screen.
6. If changing existing filament, 3D40 will automatically purge existing filament.
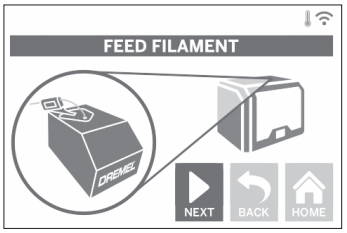
7. When Feed Filament screen appears, tap “Next” on touch screen and thread filament coming from guide tube into extruder intake until extruder feeds through on its own.
8. Filament will be drawn into the extruder and begin to exit from the hot extruder tip.
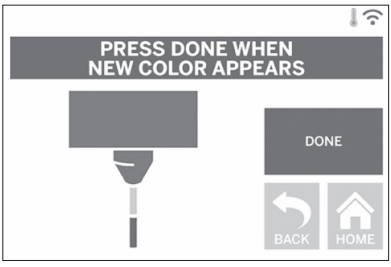
9. When new filament appears from extruder
tip, tap “done” on touch screen to complete filament load process, return to main menu, and calibrate extruder. Carefully remove excess filament without touching hot extruder tip. If necessary, carefully remove debris from extruder tip with needle nose pliers.
10. Close 3D40 lid and door.